Speed Up Your Mac with an External SSD

If you have an iMac with Thunderbolt or USB 3 but without an SSD, you can boot from a full-speed external SSD without opening the case. It's possible for that Mac to boot in under 30 seconds and to jump generations ahead for under $200.
I have a mid-2011 iMac I use in my office to keep my workspace clean and straightforward. Most of my real work takes place online or on remove servers. The OS isn't a factor that I take into consideration. Nevertheless, Mac OS X or macOS running on an HDD iMac is SLOW. It can easily take 4 minutes to fully boot to a useful state.
I wanted to move my system device to an SSD to improve that performance. Realizing that opening up an iMac is an absolute nightmare I started looking for external options, and Thunderbolt presented itself as the best possible option for my model. Thunderbolt can transfer at 5 Gb/s and USB 3 at 2.5 Gb/s. Either of these is more than enough to take full advantage of an SSD. FireWire 800 is also an option for older iMacs, although I haven't extensively researched it. My mid-2011 model only had Thunderbolt support, so Thunderbolt it was.
LaCie now makes ready-to-go Thunderbolt ($196 at time of writing) and USB 3 ($140 at time of writing) external SSD drives that can be easily connected to your Mac. All you need to do is connect the drive and boot from it (remember, the drive will always need to stay connected, since your Mac will be running from this drive!).
To begin, download the OS X or macOS version you're using. To do that head to the App Store (command + space and type "app store" to find the application). Go to the product page for the OS version you're using and click Download, then Continue to download the full Installer. The full installer is several Gigabytes in size, and will take some time to download; it has everything necessary to make a completely fresh installation of macOS.

If you don't want to end up with a totally "clean" new Mac OS X/macOS install, use this time to make a full Time Machine backup that can be restored to the newly installed copy of Mac OS X/macOS once it's completed. Learn how to set up Time Machine with Apple Support.
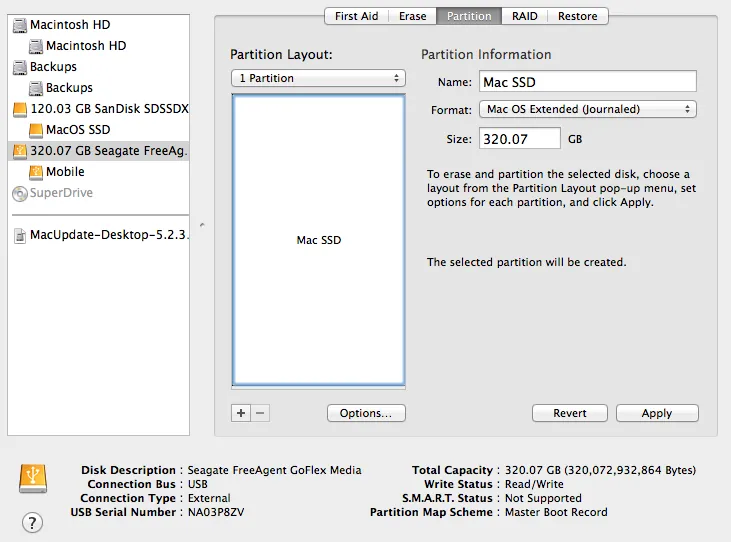
Open the Disk Utility (command + space and type the name of the application) and click on your NEW external SSD and choose the Partition tab, and choose 1 Partition from the drop-down menu. Select macOS Extended (Journaled) as the Format and Name the new partition whatever you'd like.

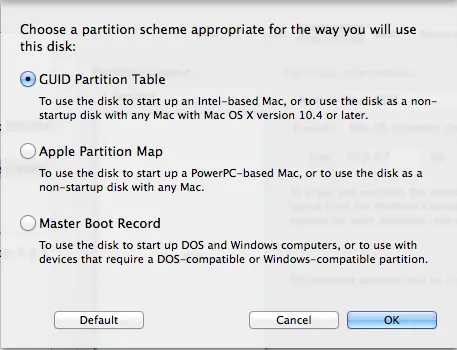
Click the Options... button and choose GUID Partition Table as the partition scheme and click "OK". Finally, verify your choices one last time and click Apply in the Disk Utility window to commit your changes to the new disk.

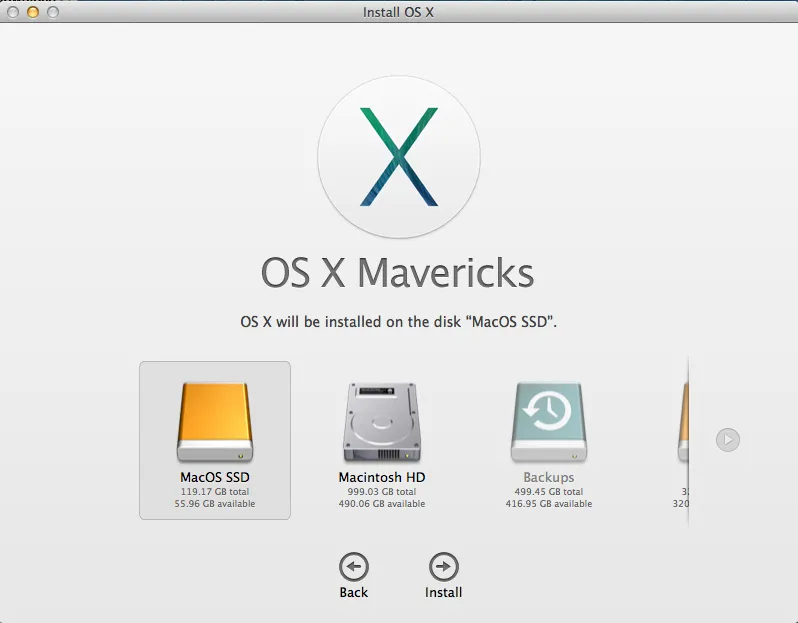
Go ahead and start the OS X / macOS installation wizard, and continue through the first screens until you reach the disk selection step. Here, select "Show All Disks..." and choose the new external partition you created earlier, finally selecting "Install" and confirm your administrative password to begin installing OS X / macOS on your new drive.

If you're restoring a Time Machine backup, once the new OS is installed, shut down your Mac and hold down Command + R while booting it up again. You'll see the Recovery Options window, and from here you can select "Restore from a Time Machine backup" and follow the steps to restore your files and preferences from the backup you took earlier to your new installation. If you find any applications missing from your restored system, you can usually copy them from the Applications directory of the internal hard drive that will still be available from inside Finder.
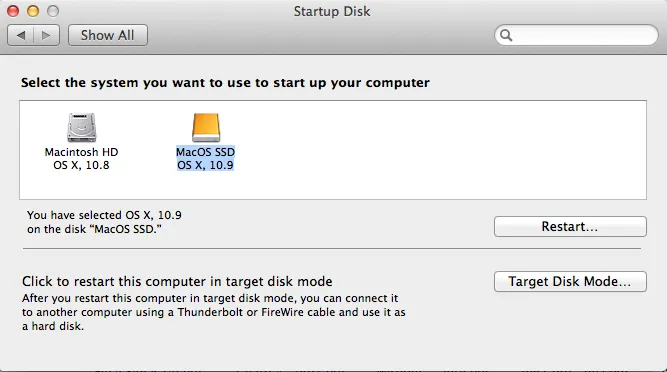
Your Mac should begin to use the new External disk to boot automatically from now on. But if it doesn't, you can press and hold the Option key while starting your Mac to select which disk you want to boot from. You can also change the default startup disk on the Startup Disk preferences screen by booting into your new installation, clicking the Apple icon in the top-left corner and selecting "System Preferences..." then "Startup Disk" and choosing your external SSD drive in the list.

